
 Save
Save
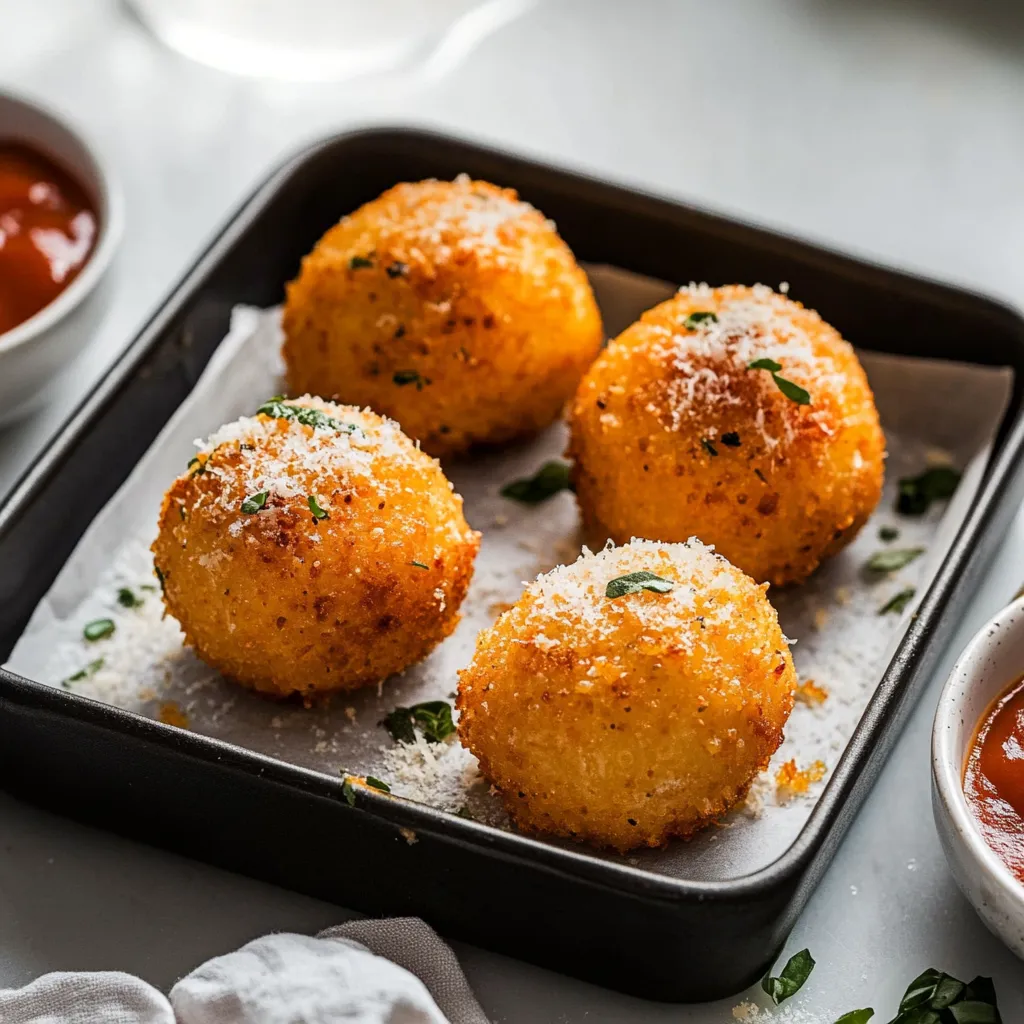
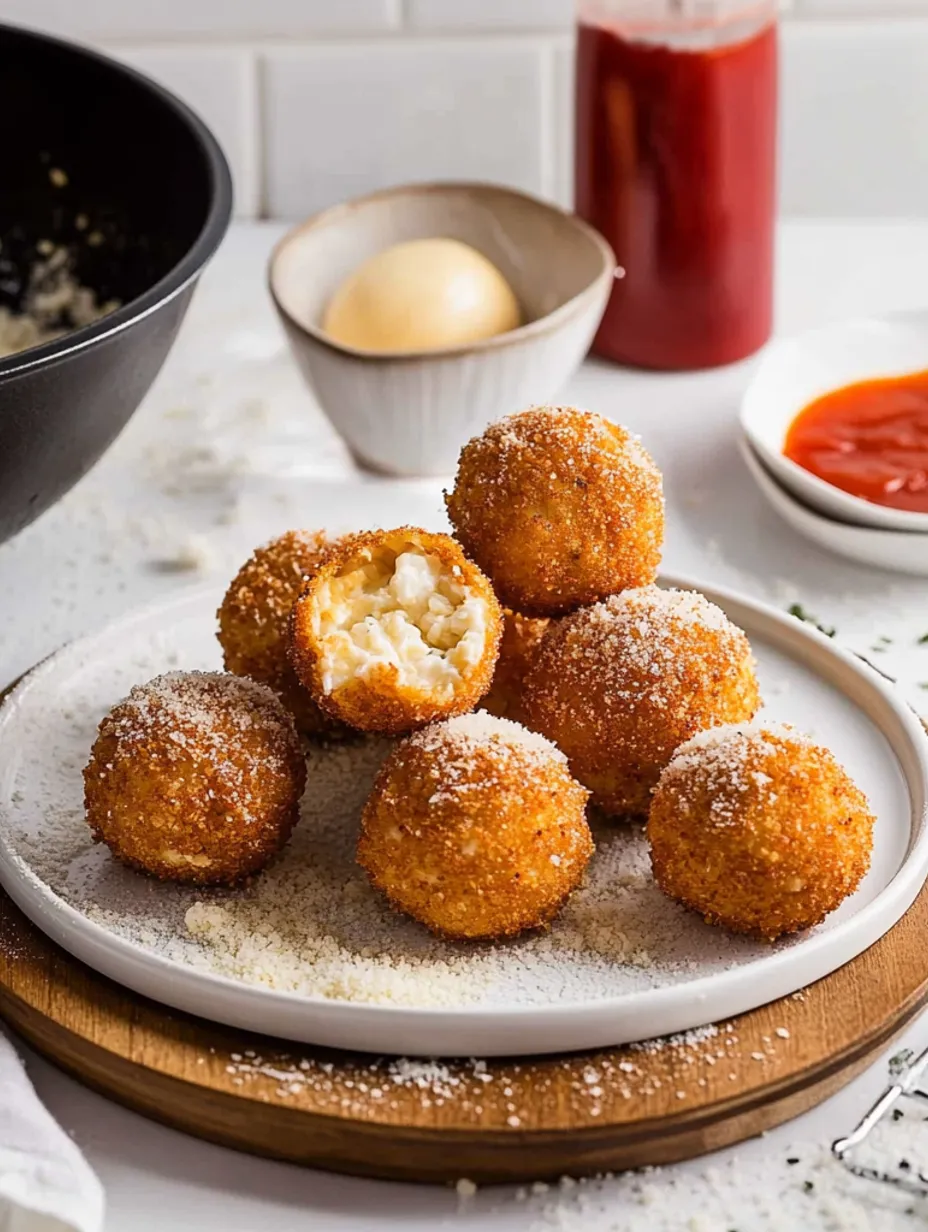
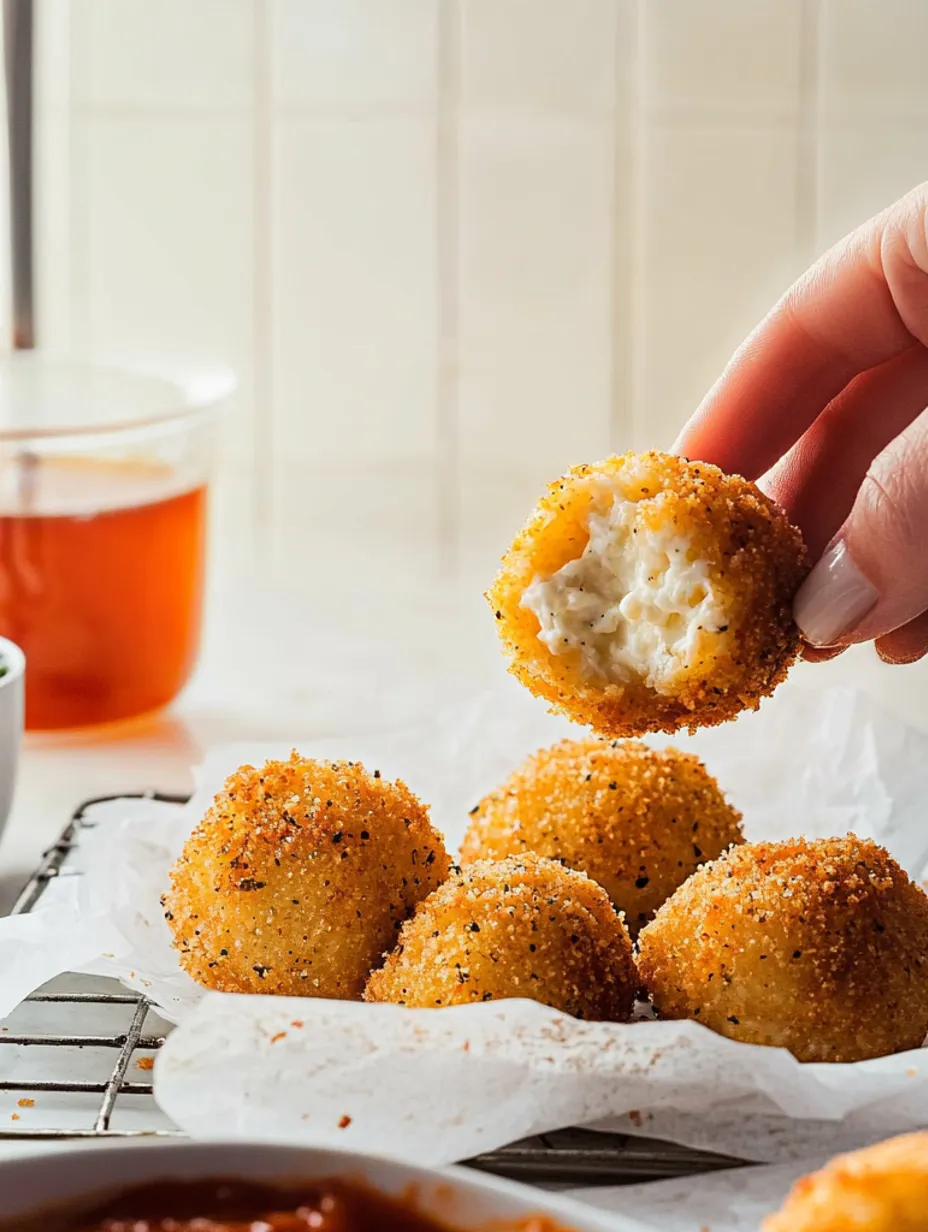
Crunching into that crispy outer layer to find soft, creamy cheesy risotto inside is just unbeatable. I've been wowing friends with these Sicilian rice balls ever since my elderly Italian neighbor showed me how to make them. I used to hang around her kitchen watching her transform simple leftover risotto into these golden gems. The best bit? Breaking one open and seeing that gooey cheese stretch into long strands.
My first try was awful - I didn't chill them long enough and they broke apart in the hot oil. I've learned a lot since then, and now I'm sharing all my tips with you.
Complete Ingredients Breakdown
- Leftover Risotto: Yesterday's batch works perfectly - the starch firms up overnight. I tried using fresh hot risotto once and ended up with a sticky mess
- Mozzarella: Don't cheap out here. I grab mine from our neighborhood Italian market - it melts beautifully
- Ricotta: Go for full-fat - the diet version leaves your filling too dry. If yours seems too wet, let it sit in a strainer for half an hour
- Breadcrumbs: The Italian type works best. I toss in some panko too for extra crispiness
- Oil for frying: Sunflower's my pick - it handles high heat well and won't mess with your delicate cheese flavors
 Save
Save
Delightful Cooking Instructions
- 1.
- Start by breaking up your cold risotto clumps with your fingers. My grandma always said hands work better than spoons for this job, and she wasn't wrong
- 2.
- Time to add those cheeses. Mix them in softly like they're fragile. You want everything blended but not squished together. You should still spot bits of ricotta here and there
- 3.
- Here's a trick I learned after many messy attempts - dampen your hands before rolling. The mixture won't stick, and you'll get nice smooth balls. Aim for something about golf ball sized
- 4.
- Set up your coating station properly. Put flour, whisked eggs, and breadcrumbs in separate flat dishes. I find pie plates work great for this
- 5.
- Use one hand for dry stuff (flour and crumbs) and the other for egg dipping. This keeps you from ending up with fingers coated thicker than the arancini
I stumbled on something cool last Christmas when I ran out of normal breadcrumbs. I smashed up some taralli (those Italian snack rings) instead, and everyone said they were the tastiest batch yet.
Flawless Frying Technique
Getting that golden outside while keeping the inside gooey took me forever to figure out. Stick to 350°F for your oil - any hotter and the coating browns before the insides warm up. I keep a candy thermometer in the pot to watch it. Don't try cooking too many at once; they need room to move around.
Creative Variations
Let's explore fillings. The classic version is great, but I love playing around. My children go crazy for ones with a small mozzarella chunk and a bit of meat sauce inside. I tried some with pesto and pine nuts last week that vanished almost instantly.
 Save
Save
Clever Storage Solutions
I've picked up some tricks for keeping these golden treats at their best. Last summer I made tons for our family get-together and found they're actually pretty flexible if you know what you're doing:
* They're best fresh, but if you need to prep ahead, freeze them BEFORE cooking
* Put them on a tray without touching and freeze them solid. Then bag them up - they'll stay good for three months
* Don't let them thaw before frying - they actually turn out better going straight from freezer to hot oil
Tasty Accompaniments
My family loves these with bright tomato sauce, but lately I've been trying:
* A fiery arrabbiata that balances the richness
* Garlicky pesto mayo for something different
* Just plain lemon wedges - sometimes simpler is better
Common Problems Solved
After making countless batches, I've run into every issue possible. Here's what I've learned:
* If they fall apart during cooking, your oil isn't hot enough
* Cheese bursting out means you didn't close them properly - check those edges
* If they're getting too dark too fast, your oil's too hot. Take them out, let the oil cool down, then keep going
Closing Thoughts
These aren't just snacks - they're little joy bombs that draw folks together. My kitchen always gets crowded when news spreads that I'm making arancini. There's something special about seeing people's faces light up when they bite through that crunchy shell into the creamy middle.
Just remember, making arancini is like any kitchen adventure - your first try might not be perfect, but you'll get better each time. And honestly? Even the weird-looking ones get eaten just as quickly. So go on and start rolling - your kitchen's gonna smell amazing soon!