
 Save
Save
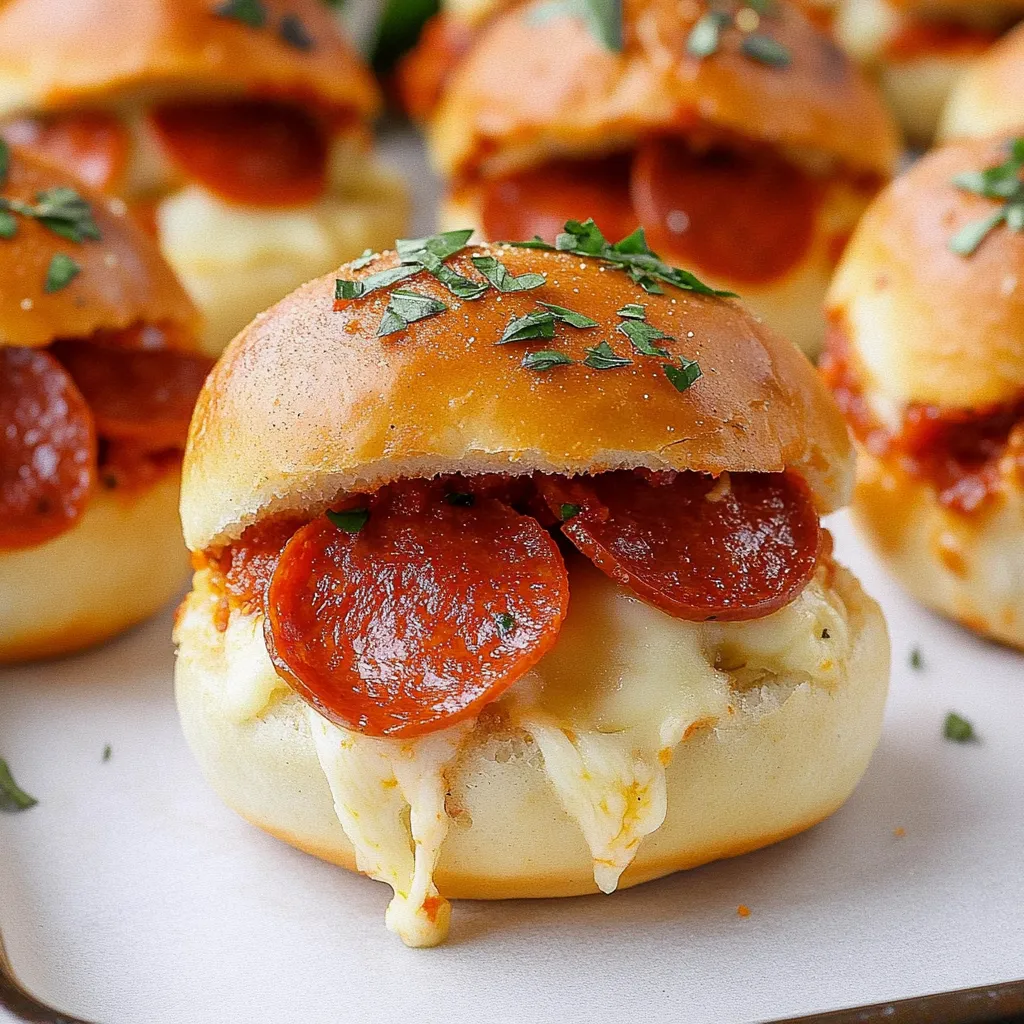
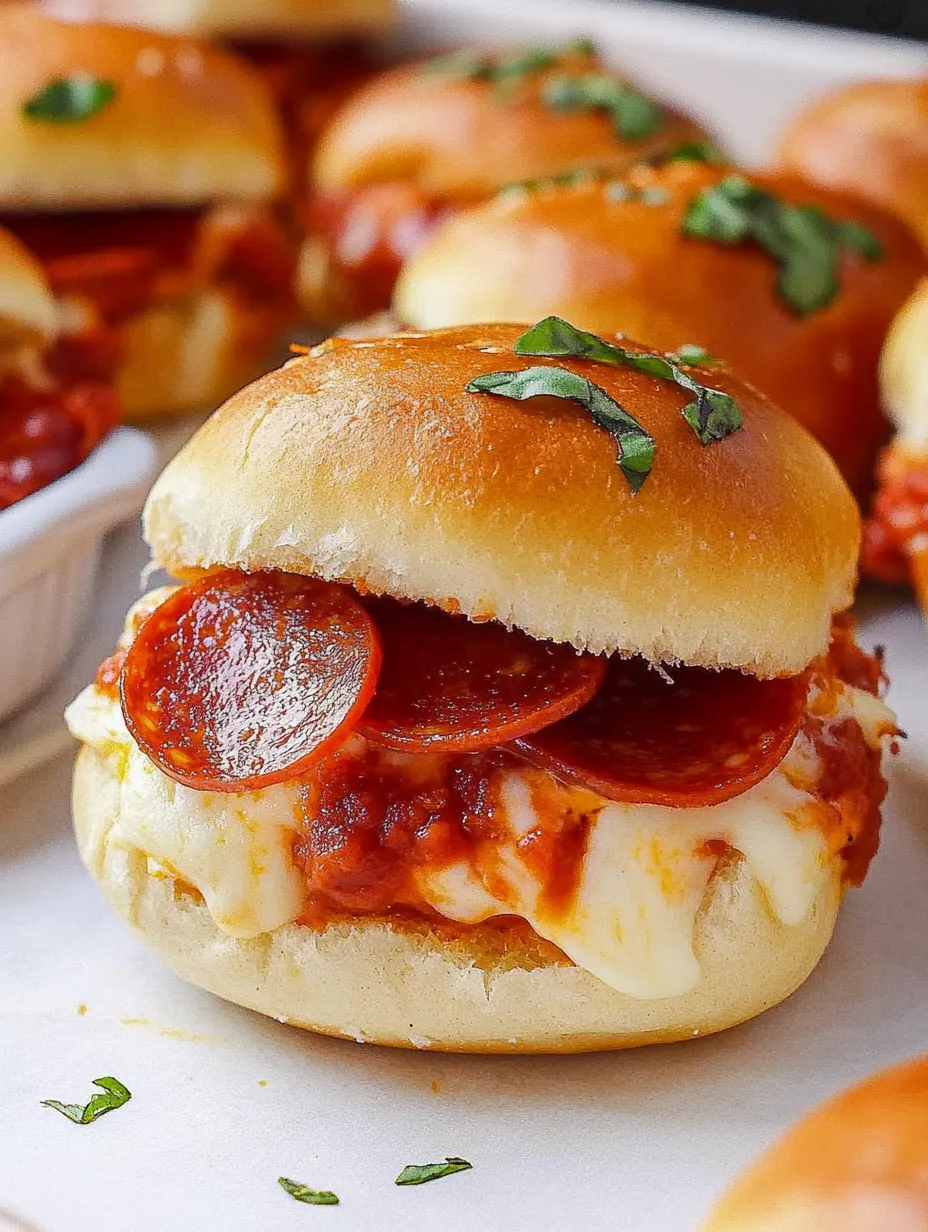
Pepperoni Pizza Sliders evolved from my desperate need to feed my son's hungry baseball team without spending the whole afternoon in the kitchen. These little handheld beauties pack all the flavor of pizza but require zero dough-making or delivery waiting. My family now requests them constantly, and honestly, I don't mind since they come together so quickly. The combination of soft, slightly sweet buns with that gooey cheese and spicy pepperoni hits all the right notes for a crowd-pleasing meal or snack.
I brought these to my book club last month and watched as conversation completely stopped while everyone grabbed seconds. My friend Lisa, who claims she 'doesn't do carbs,' ate three and then asked for the recipe in the same breath. There's something about that buttery garlic topping that makes even the most disciplined eaters throw caution to the wind.
Must-Have Ingredients
- Slider buns: Hawaiian sweet rolls are my go-to since that hint of sweetness plays so well against the savory fillings and they hold together beautifully
- Marinara sauce: Thicker is better here to prevent soggy bottoms, so I usually go with Rao's or drain regular sauce in a fine mesh strainer for a few minutes
- Cheese blend: While straight mozzarella works fine, I've found adding a handful of provolone or fontina creates more complex flavor without getting weird looks from picky eaters
- Pepperoni slices: Mini pepperonis distribute more evenly, but regular slices cut into quarters work in a pinch and sometimes create those crispy edges we fight over
- Flavor-packed butter: This magical mixture of melted butter, garlic, herbs and a pinch of heat transforms ordinary buns into something irresistible
 Save
Save
Slider Assembly
- Bun Splitting Technique:
- Keep those slider buns connected and slice through the entire slab horizontally with a serrated knife. This creates uniform top and bottom pieces that make assembly ten times easier. Sometimes the bottom layer can get a bit soggy during baking, so I often put just the bottom slab in the oven for about 3 minutes to create a sturdier base before adding toppings. My husband actually prefers when I forget this step since he likes the bread to soak up more sauce.
- Sauce Spreading Method:
- Use the back of a spoon to spread marinara in a thin, even layer across the bottom half of the buns. You need less than you think – about half a cup for a standard 12-count package. The first time I made these, I went overboard with sauce and created a soggy mess that required forks to eat. Now I sometimes even pat the sauce with a paper towel if it seems particularly watery, which sounds fussy but takes two seconds and makes a huge difference.
- Layering Approach:
- Start with a sprinkle of cheese directly on the sauce, then layer your pepperoni, then finish with more cheese. This cheese-meat-cheese strategy traps the pepperoni in melty goodness and prevents it from making direct contact with the bread. For maximum coverage, I slightly overlap the pepperoni pieces so every bite gets that spicy flavor. My kids have been known to peek under the top layer and rearrange pepperoni if they think distribution isn't fair.
- Topping Application:
- Place the top slab of connected buns over everything and press down slightly. Don't smash them, just give a gentle press to help everything stick together. If some filling squeezes out the sides, just tuck it back in – those crispy cheese bits that escape and caramelize on the baking dish often become the most fought-over bites. My daughter specifically requests 'extra cheese around the edges' because she loves those crunchy bits.
- Butter Magic:
- Whisk together melted butter with garlic powder, oregano, and a pinch of red pepper flakes. This mixture is the secret weapon that transforms these from basic sandwiches into something special. Using a pastry brush, generously slather this all over the tops of the buns, making sure to get it into all the crevices. The butter seeps into the bread as it bakes, creating this incredible flavor-packed crust that's impossible to resist. I've been known to make extra of this mixture just to have for garlic bread on other nights.
- Baking Process:
- Cover with foil for the first part of baking to protect those tops while the filling heats through. When you remove the foil for the final minutes, don't walk away – the transition from perfectly golden to burned happens in the blink of an eye. I learned this lesson the hard way during my daughter's birthday party when I got distracted by the doorbell. Now I set a separate timer on my phone as backup.
My neighbor Mike claims he doesn't cook, but after tasting these at our block party, he called for step-by-step instructions and now makes them for his poker nights. His exact words were, 'Even I couldn't screw these up, and the guys acted like I turned into Gordon Ramsay overnight.' Sometimes the best recipes are the ones that give cooking confidence to people who swear they can't boil water.
Perfect Partners
Pair these sliders with a simple green salad tossed in vinaigrette for a complete meal that comes together in under 30 minutes. During football season, I serve them alongside a veggie tray with ranch dip to ease my guilt about all the cheese we're consuming. For birthday parties, I arrange them next to fruit skewers for a colorful spread that appeals to both kids and adults – though the adults usually sneak more sliders when they think nobody's watching.
Tasty Twists
Swap the pepperoni for cooked Italian sausage and sautéed bell peppers for a supreme pizza variation that tastes like it came from your favorite pizzeria. Try breakfast sliders using scrambled eggs, crumbled bacon and cheddar cheese for weekend brunches that will get even teenagers out of bed. For a fancy appetizer version, use pesto instead of marinara, top with thin slices of roma tomato and fresh mozzarella, then finish with a balsamic drizzle after baking.
Smart Storage
Wrap any leftover sliders individually in foil and refrigerate for up to three days. To reheat, pop them in a 325°F oven for about 10 minutes – microwaving works in a pinch but gives you soggy tops instead of that crispy butter crust. When I know we'll have leftovers, I sometimes hold back a few uncooked sliders and store them in the fridge, then bake them fresh the next day for lunch.
 Save
Save
I've been making these sliders for nearly every gathering at our house for the past three years, tweaking the recipe slightly each time. My brother-in-law, who normally only comments on food to complain, actually asked for the recipe after demolishing four of them at our July 4th cookout. There's something so satisfying about watching someone who usually orders from fancy restaurants enjoy something this simple. These little sandwiches prove that sometimes the best food isn't about complexity or technique – it's about hitting that perfect comfort zone of flavor, texture, and familiarity with just enough of a twist to make it special.
Recipe FAQs
- → Can I make these ahead of time?
- Yes, assemble ahead and refrigerate up to 24 hours before baking.
- → What can I use instead of Hawaiian rolls?
- Any slider buns work, though Hawaiian adds a nice sweet contrast.
- → Can I add other pizza toppings?
- Yes, add any favorites like mushrooms, bell peppers, or olives.
- → How do I store leftovers?
- Refrigerate up to 3 days, reheat in oven at 300°F until warm.
- → Can I make these less spicy?
- Simply omit the red pepper flakes for a mild version.