
 Save
Save
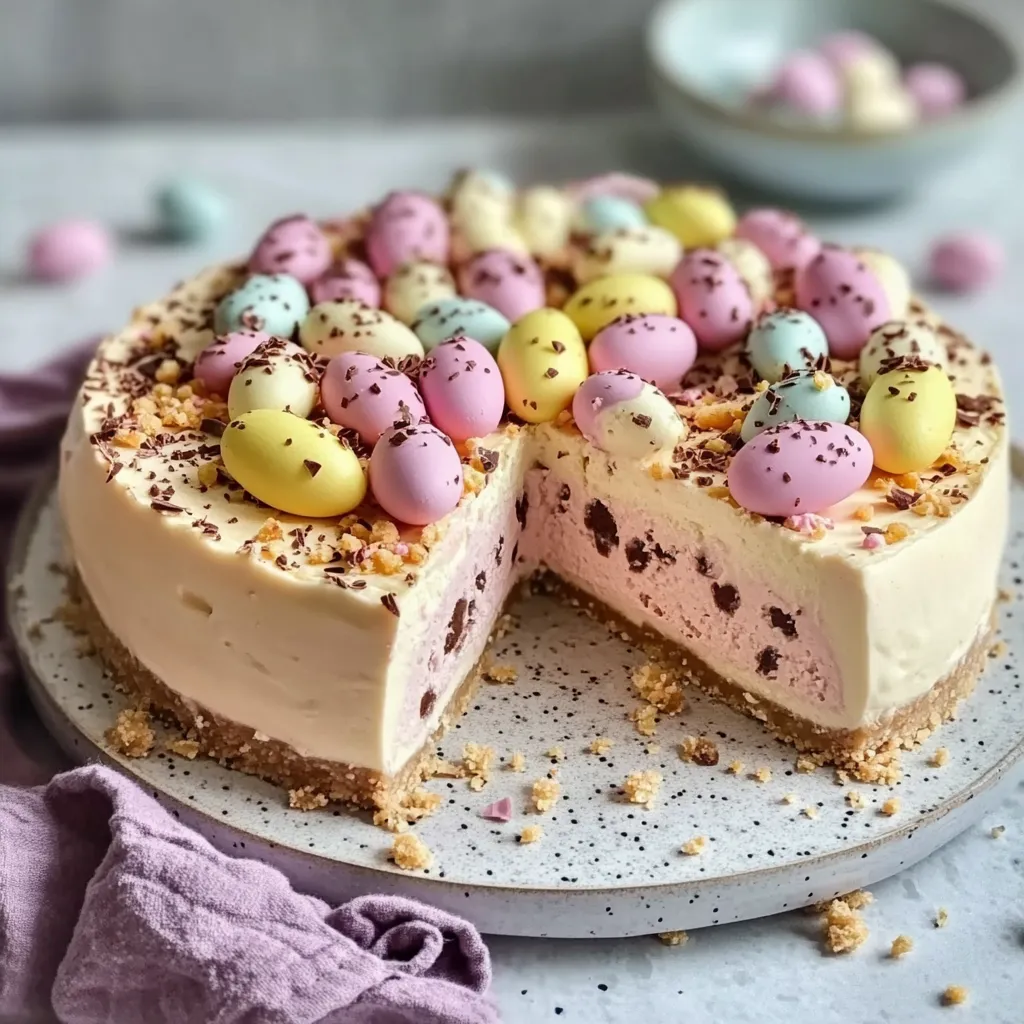
Don't bother heating your oven for this Easter mini egg cheesecake treat. The crumbly cookie bottom works perfectly with the velvety cream cheese mixture dotted with bright Cadbury mini eggs. When you cut into it, you'll see pretty pastel chocolate bits floating in the fluffy vanilla layers. It's not just tasty—it looks amazing too, turning a basic cheesecake into an Easter treat worth showing off.
I found this treat when I needed an eye-catching Easter dessert that wouldn't fight for oven space with our holiday meat. When I brought it out, everyone went quiet as they took their first bites. My nephew, who usually passes on sweets, asked for seconds before finishing what was on his plate. Even better—my super picky mother-in-law wanted the recipe, which is probably the best compliment this cheesecake could ever get.
Amazing Ingredients
- Digestive Biscuits: Give you that fantastic buttery bottom with just enough sweetness. They have a special wheat taste that goes better with the creamy filling than regular graham crackers would
- Philadelphia Cream Cheese: Brings that slightly tangy richness you need for real cheesecake flavor. Always go full-fat for the best texture and firmness
- Double Cream: Makes the thick cream cheese feel light as a cloud. Whip it on its own first before mixing in for that fluffy mousse feeling
- Vanilla Bean Paste: Adds deep flavor with little dark specks of real vanilla. Tastes so much better than plain extract and makes every bite smell wonderful
- Powdered Sugar: Makes it sweet while mixing in completely. The tiny particles mean your cheesecake stays silky smooth with no grainy bits
- Mini Eggs: Look festive and give you something to crunch on. Their candy coating and milk chocolate centers make sweet little bursts all through the filling
- Fine Salt: Makes everything taste more like itself without being salty. Just a tiny bit makes the vanilla pop and keeps it from being too sweet
Making Your Cheesecake
- Setting Up The Bottom:
- Start by putting parchment paper in a 9-inch springform pan with extra hanging over for easy lifting later. Crush your digestive biscuits until fine but not powdery. Mix with melted butter until it looks like damp sand, then push firmly into the pan with a measuring cup bottom. Make it level with a slight edge up the sides to hold everything.
- Getting The Cream Cheese Ready:
- Make sure your cream cheese sits out until completely soft or you'll get lumps. Beat it until smooth and a bit fluffy with your electric mixer, stopping often to scrape the bowl. This first step really matters for getting that silky texture throughout.
- Whipping The Cream:
- In another bowl, whip cold double cream until it forms stiff peaks that don't fall when you lift the beater. It should look fuller but not so whipped that it turns grainy or starts becoming butter. Good whipping puts air in that makes the no-bake texture just right.
- Adding Sweetness:
- Mix powdered sugar, vanilla bean paste, and salt into your beaten cream cheese until just combined. Take a taste and add more sweetness if needed, but remember the mini eggs will make it sweeter when finished.
- Combining Everything Carefully:
- Use a big rubber spatula to fold the whipped cream into the cream cheese mix very gently. Cut down the middle, sweep across the bottom, and fold over the top in a J-shape instead of stirring, which would let all the air out. Keep going until you don't see white streaks but don't overmix.
- Adding The Mini Eggs:
- Put mini eggs in a plastic bag and crush them with a rolling pin to get pieces of different sizes. Fold three-quarters of the crushed eggs into your mixture, saving the rest for the top. Having different sized pieces makes each bite more interesting.
- Putting It Together:
- Pour your filling onto the cold biscuit base and smooth the top with an offset spatula. Tap the pan against the counter a few times to get rid of any big air bubbles that might leave holes in your finished cheesecake.
- Cooling Time:
- Cover loosely with plastic wrap and put in the fridge at least 6 hours, but better overnight. This long cooling time lets it set up properly and helps the flavors mix together. Being patient here means you'll get perfect slices and texture.
 Save
Save
My grandma always said cheesecake needs patience more than anything else. The first time I tried making this, I rushed and didn't let it chill long enough, ending up with a middle that was too soft. Next time, I listened to her advice and left it in the fridge all night. What a difference—perfect texture, clean-cut slices, and the flavor was so much better because everything had time to blend together. Sometimes waiting really is the secret ingredient.
Beautiful Serving Ideas
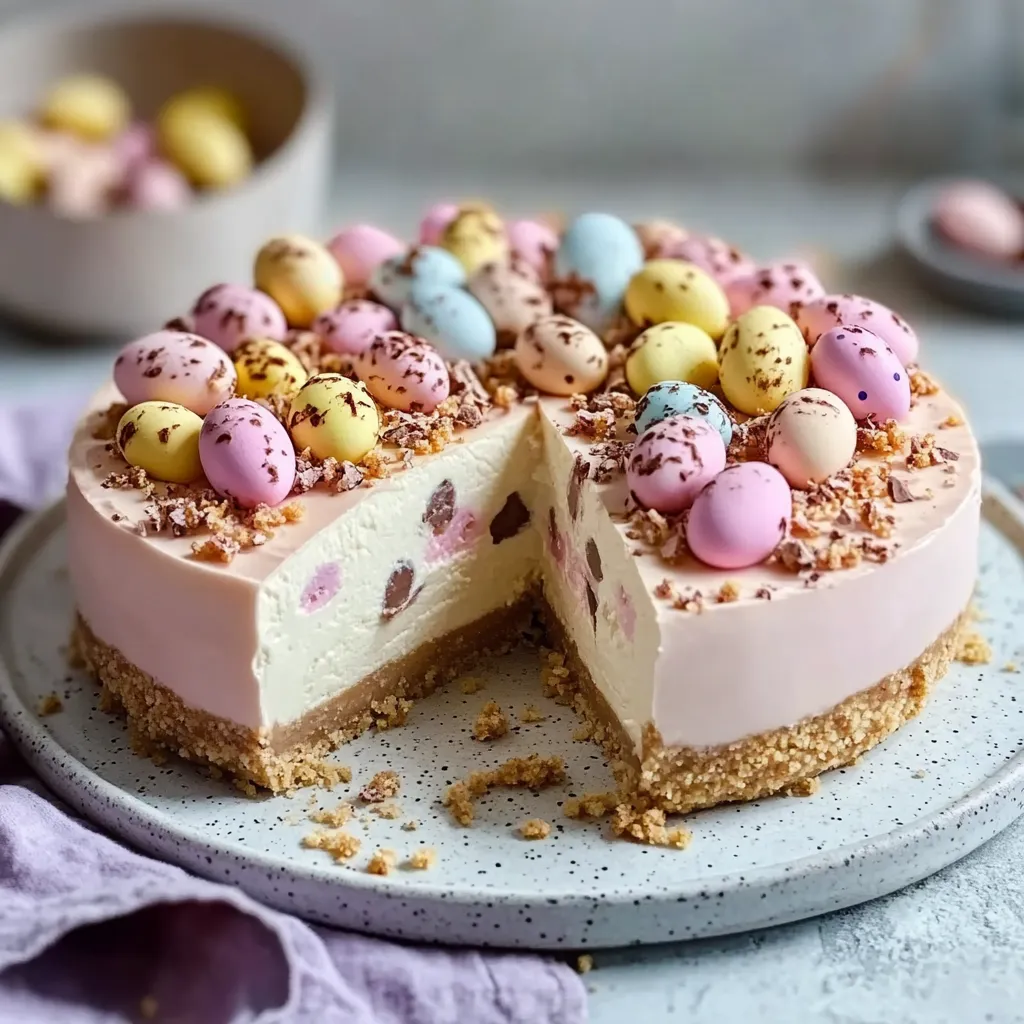
This gorgeous dessert deserves to be shown off right. Only take it out of the springform pan after it's completely chilled, using the extra parchment to help move it to a serving plate. Put whole and halved mini eggs around the outer edge to make it look like an Easter nest. For special times, sprinkle a little powdered sugar 'snow' around the edges and add chocolate curls made by running a vegetable peeler down a chocolate bar. Serve pieces on cold plates with fresh berries for extra color.
Fun Twists To Try
Play around with this flexible recipe by trying different flavors and ways to serve it. Make a chocolate version by adding 100g melted dark chocolate to your cream cheese mixture before folding in the whipped cream. If you love lemon, mix in zest from two lemons plus 2 tablespoons of juice for a fresh, tangy flavor. For smaller portions, make it in glass jars or little cups for easy serving. White chocolate fans might like 100g of melted white chocolate in the filling with raspberries added along with the mini eggs for pretty color contrast.
Keeping It Fresh
Keep your cheesecake tasting great by storing it right. Cover it and keep in the fridge up to 4 days, though the mini eggs might get a bit softer over time. To store longer, wrap single slices in plastic then foil and freeze for up to a month. Let frozen slices thaw in the fridge overnight for best results. If making for a party, you can prepare this up to two days before and keep refrigerated until time to serve.
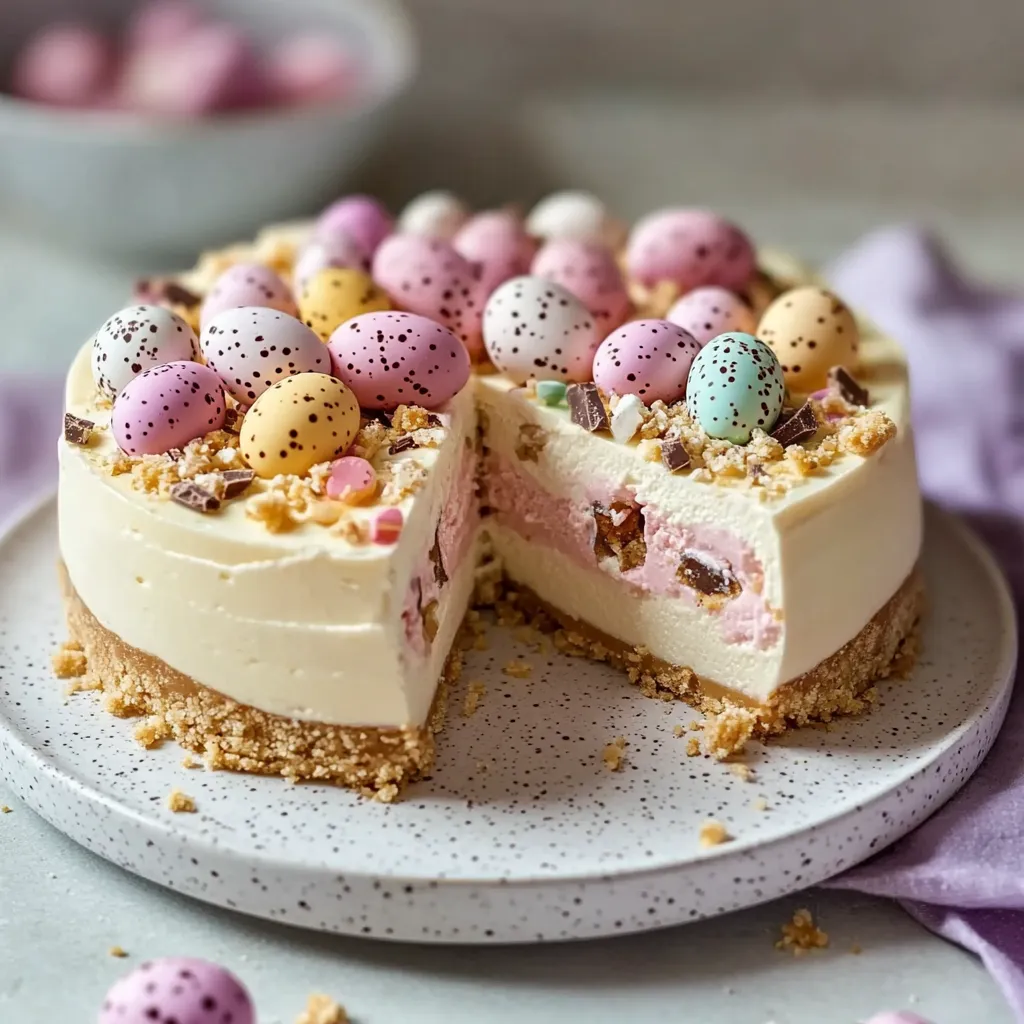
This Easter no-bake mini egg cheesecake shows how basic ingredients can come together to make something really special. The way the smooth, creamy filling contrasts with crunchy chocolate bits makes it hard to resist, while the classic flavors of vanilla cheesecake and favorite Easter candy create something that feels grown-up yet nostalgic. Whether you're ending a fancy Easter dinner or just brightening up a casual spring get-together, this easy-to-make but impressive dessert brings happiness with every colorful slice.
 Save
Save
Recipe FAQs
- → Can I fix this dessert ahead?
- Of course! Make it 1-2 days in advance and store in the fridge. The flavors actually get better with time.
- → What works if I don’t have Mini Eggs?
- Swap them for M&Ms, chocolate eggs, or even candy chunks. For a non-Easter vibe, crushed cookies or toffee bits would be yummy.
- → Does this dessert freeze well?
- It sure does! Pop it in the freezer for up to a month, wrapped tightly. When ready to serve, just thaw it overnight in the fridge.
- → Why won’t my cake set right?
- Make sure you whipped the cream enough, used full-fat cream cheese, and gave it plenty of chill time. These steps help the cake firm up.
- → Can I make this as mini cakes?
- Totally! Use cupcake liners and a muffin tin to make smaller portions. Chill for around 4 hours instead of overnight.