
 Save
Save
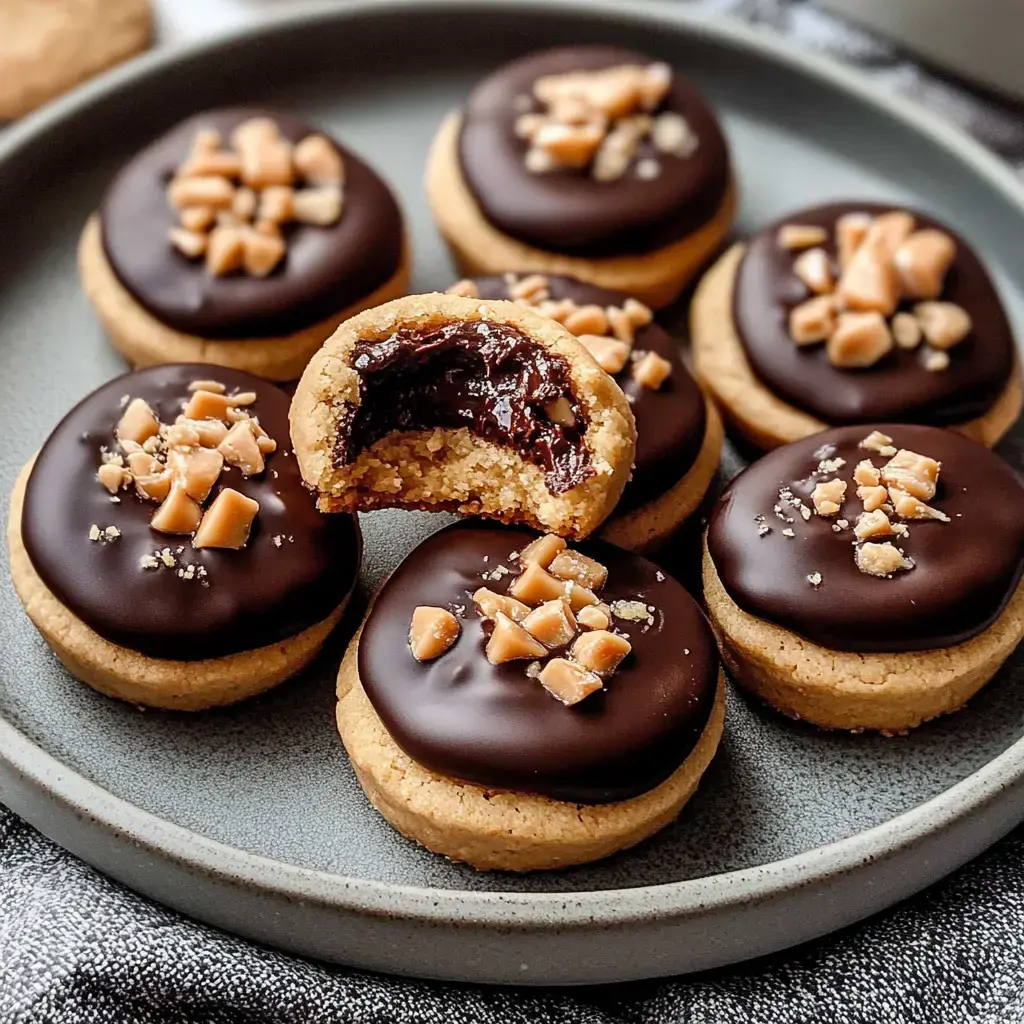
Gotta tell you about these cookie cups I can't stop making. These Peanut Butter Fudge Puddles come straight from my grandma's collection, and I've been whipping them up forever. They're these cute little cookie bowls filled with the richest chocolate fudge you can imagine. Whenever I bring them anywhere, they're gone in seconds flat.
The Magic Behind These Treats
When chocolate meets peanut butter in these goodies, you'll get hooked right away. The cookie shell has this amazing crisp outer edge but stays perfectly soft inside, and that chocolate center is just dreamy. They look super fancy but truth is they're so easy my children jump in to help make them.
Your Ingredient List
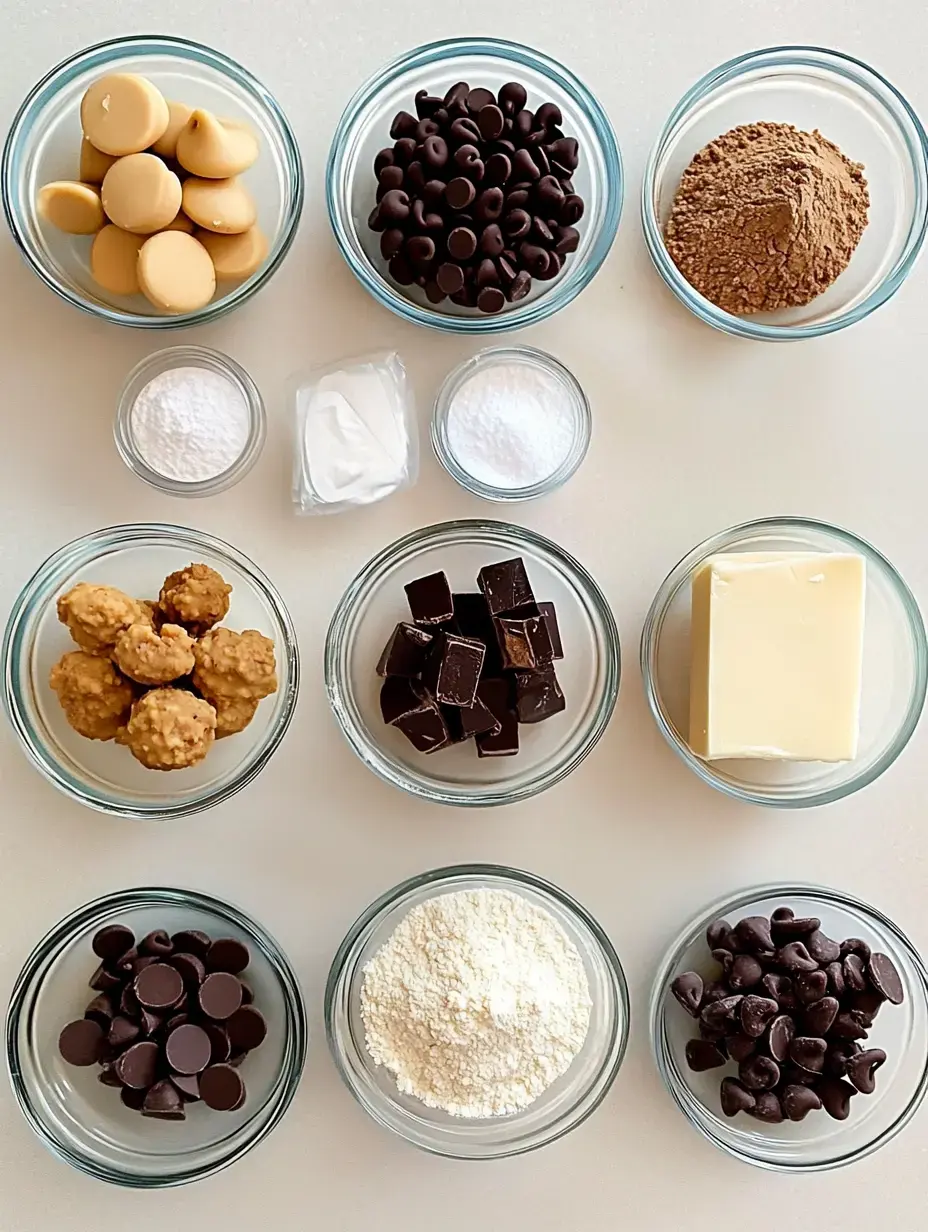
- Flour: Regular all purpose gives these the right softness.
- Oil: Just a bit keeps our chocolate center perfectly smooth.
- White and Brown Sugar: Together they create the perfect sweetness.
- Mascarpone Cheese: My hidden trick for an ultra-creamy filling.
- Chocolate: Don't cheap out here, better quality makes a huge difference.
- Peanut Butter: Brands like Skippy or Jif work way better than natural kinds.
- Butter: Always go for the real stuff, not margarine.
Getting Started
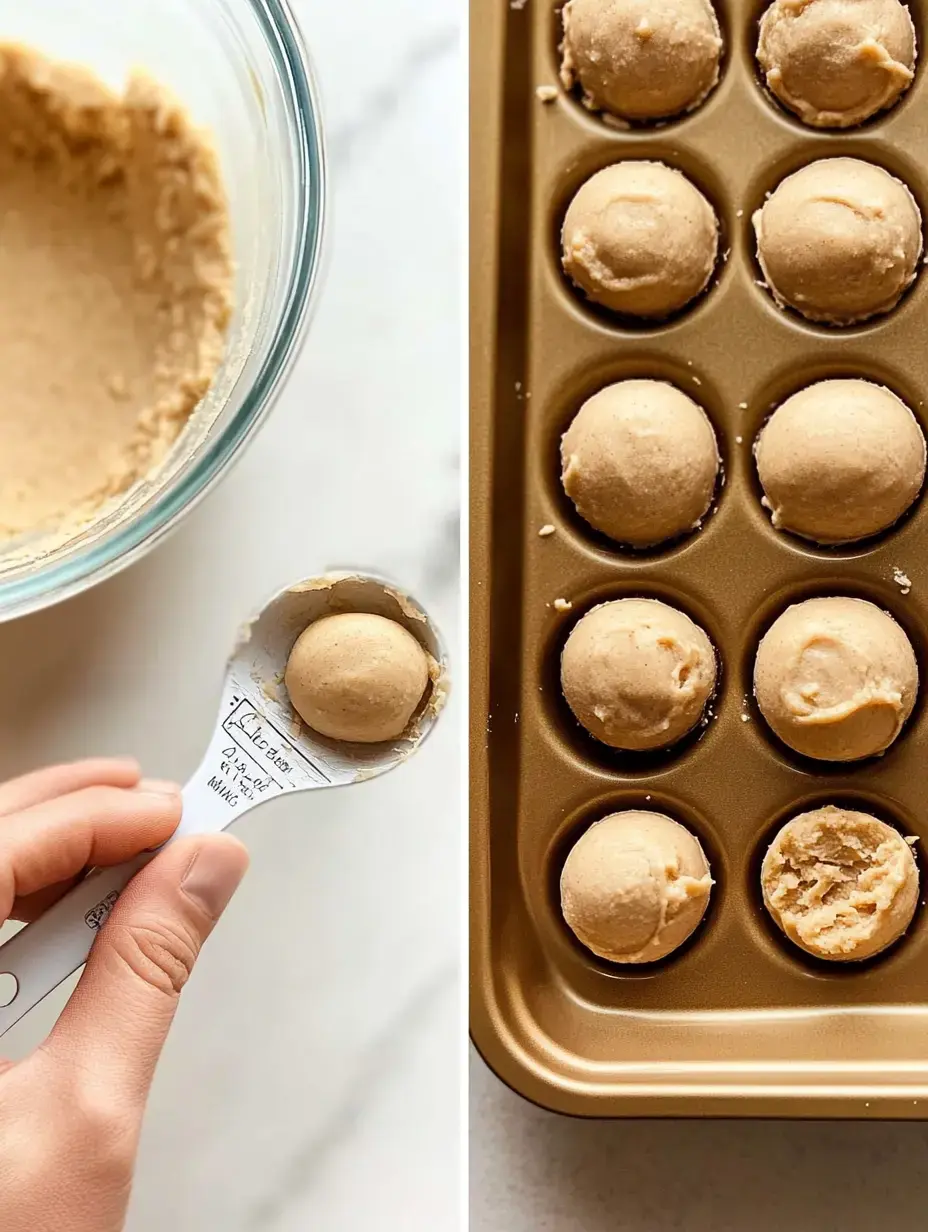
Grab your mixer first and beat the butter, peanut butter and sugars till they turn fluffy and light. Drop in your egg and vanilla, then add your dry stuff. The dough might feel pretty soft but don't stress. We'll cool it for an hour which makes it way easier to handle later.
 Save
Save
Forming Your Cookie Bowls
After the dough chills, take tablespoons of it and roll into small balls. Put them in your greased mini muffin pan then comes the fun bit, pushing your thumb into each one to create little cups. My kids always fight over who gets to do this part.
Into The Oven
Bake them at 325°F and your house will start smelling unbelievable. After about 10 minutes when they turn golden, I push the middles down again using a spoon back. This makes extra room for all that yummy chocolate we'll add later.
Creating That Dreamy Filling
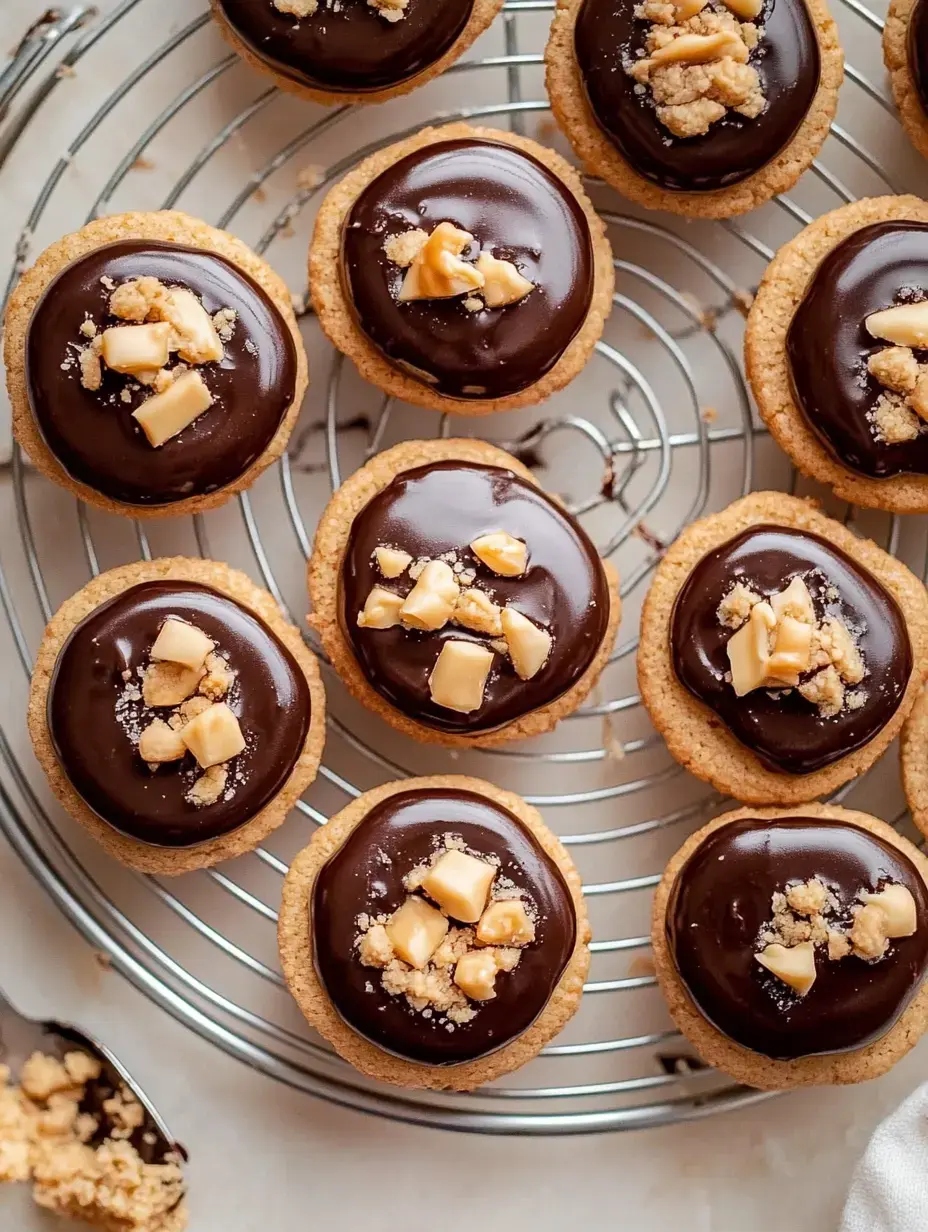
Here comes my favorite step, making that chocolate center. I melt the chocolate super slowly with a tiny bit of oil until it's velvety smooth. Then I mix in the mascarpone which turns it into this rich, creamy dream. This filling is why everyone begs me for the recipe.
Assembly Time
When the cookie cups cool down, start spooning that gorgeous chocolate mix into each one. I use a small teaspoon and try hard not to eat it all straight from the bowl. Move pretty quick so the chocolate sets evenly across all your cups.
 Save
Save
Add Something Special
Before the chocolate hardens completely, I love throwing on different toppings. Maybe some crushed toffee or a tiny bit of sea salt. For big gatherings I'll add bright sprinkles or tiny chocolate chips. These little extras make them look super impressive.
Smart Shortcuts
Never skip cooling the dough cause it really helps when you're shaping them. Make sure they bake long enough too, cause underbaked cookies might fall apart. If any stick to the pan, just run a butter knife around the edges and they'll come out fine.
Storage Secrets
These goodies stay amazing in a sealed container for around 5 days if nobody eats them first. I often keep them in the fridge especially during hot weather to keep the filling nice and firm. They're perfect for making ahead when you're planning a get-together.
The Universal Appeal
Something about chocolate and peanut butter together just works magic and these cookies show it off perfectly. They're just the perfect bite size and look stunning on any dessert platter. Every batch reminds me of baking alongside my grandma and now I can create those same memories with my kids.
 Save
Save
Summary
These bite-sized snacks are peanut butter cookies filled with smooth chocolate mascarpone. A surprise ingredient keeps the filling creamy and soft. They’re perfect to make ahead for parties or as edible gifts. Lower baking temperature ensures the cookies stay tender and moist.
Recipe FAQs
- → Can I switch to another nut butter?
Sure! Almond butter or others work fine but might lead to crumblier cookies. For natural peanut butter, stir well and use it at room temperature.
- → What's a good mascarpone replacement?
If you don’t have mascarpone, use full-fat cream cheese for a tangy flavor or whip up some chocolate ganache instead.
- → Can I prep these ahead of time?
Yes! The dough can sit in the fridge for up to 3 days. You can also freeze finished cookies with or without filling for up to 3 months.
- → Why bake these at 325°F?
Baking at 325°F helps the cookies stay tender and chewy while avoiding over-browning during baking.
- → Will standard muffin tins work?
Definitely. Just use about 2 tablespoons of dough per cup and expect to make around 20 larger-sized treats.