
 Save
Save
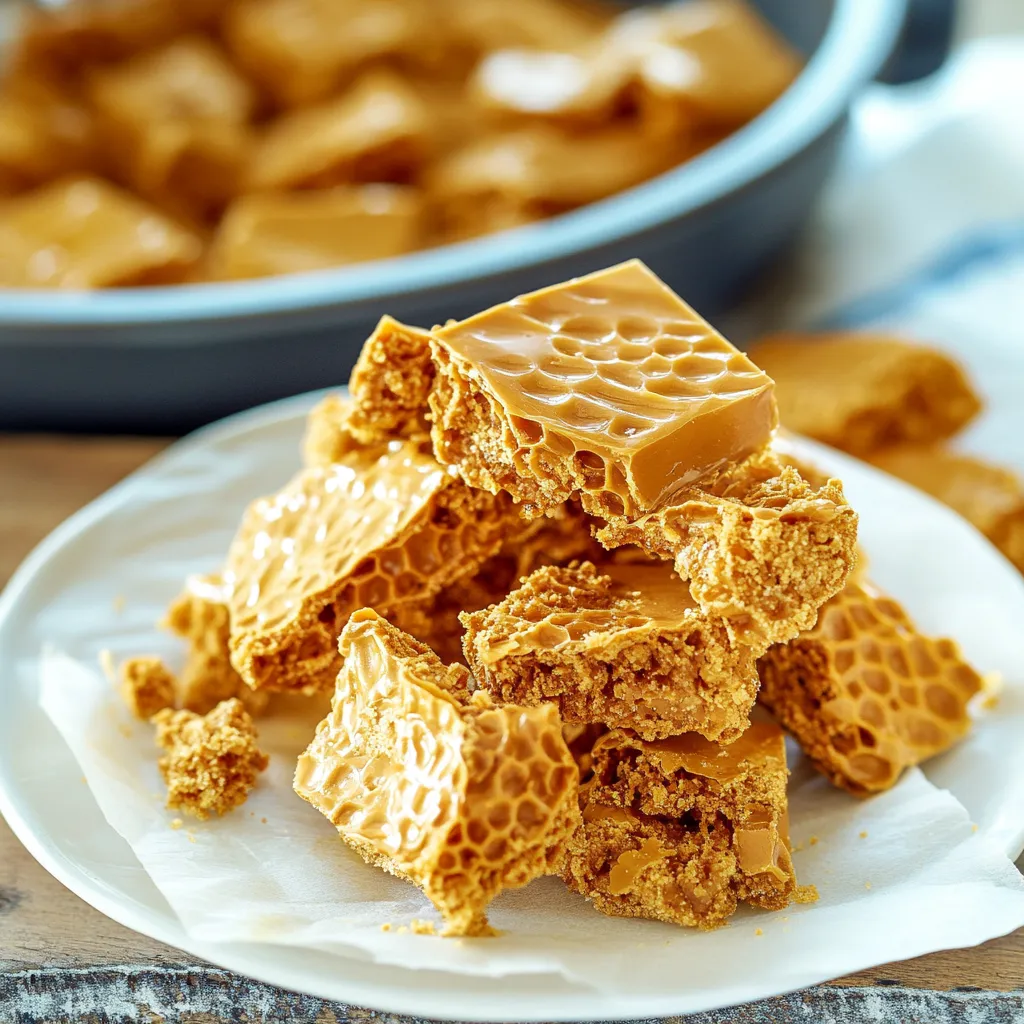
Airy honeycomb candy turns basic kitchen staples into a wondrous, light treat that breaks apart in your mouth then dissolves into sweet bliss. With its honey-like flavor and bubble-packed structure, this simple-to-make confection works great as a gift, topping for desserts, or quick fix for your sugar cravings.
I started making honeycomb after catching it on TV during a cooking competition. I couldn't believe such amazing candy came from such ordinary stuff. I still get excited watching the mixture puff up when the baking soda goes in - it's like kitchen magic happening right before your eyes.
Basic Tasty Components
- Sugar forms the foundation and gives the candy its essential sweetness
- Corn syrup stops sugar crystals from forming so you get that smooth finish
- Honey adds the signature taste that makes this candy special
- Water dissolves the sugar and helps everything heat up properly
- Baking soda creates the reaction that makes all those bubbles appear
- Vanilla adds extra flavor that cuts through the sweetness
- Salt brings out all the other tastes and makes everything pop
 Save
Save
Golden Treat Technique
Getting ReadyFirst, put parchment paper in an 8×8 inch pan with extra hanging over the edges so you can lift it out later. Don't skip this step because when the mixture foams up, you'll need to move fast. Also measure out your baking soda, vanilla, and salt beforehand to have them ready to go.
Making The BasePut sugar, water, corn syrup, and honey into a big, deep pot - bigger than you think you need since everything will expand a lot. Attach your candy thermometer to the side but don't let it touch the bottom. Mix everything together before you turn on the stove.
Watching The TemperatureCook over medium heat and don't stir it or you might get crystal chunks. You'll see it start bubbling and turning amber as it cooks. Keep an eye on your candy thermometer because you need to hit exactly 300°F - that's when all the good stuff happens.
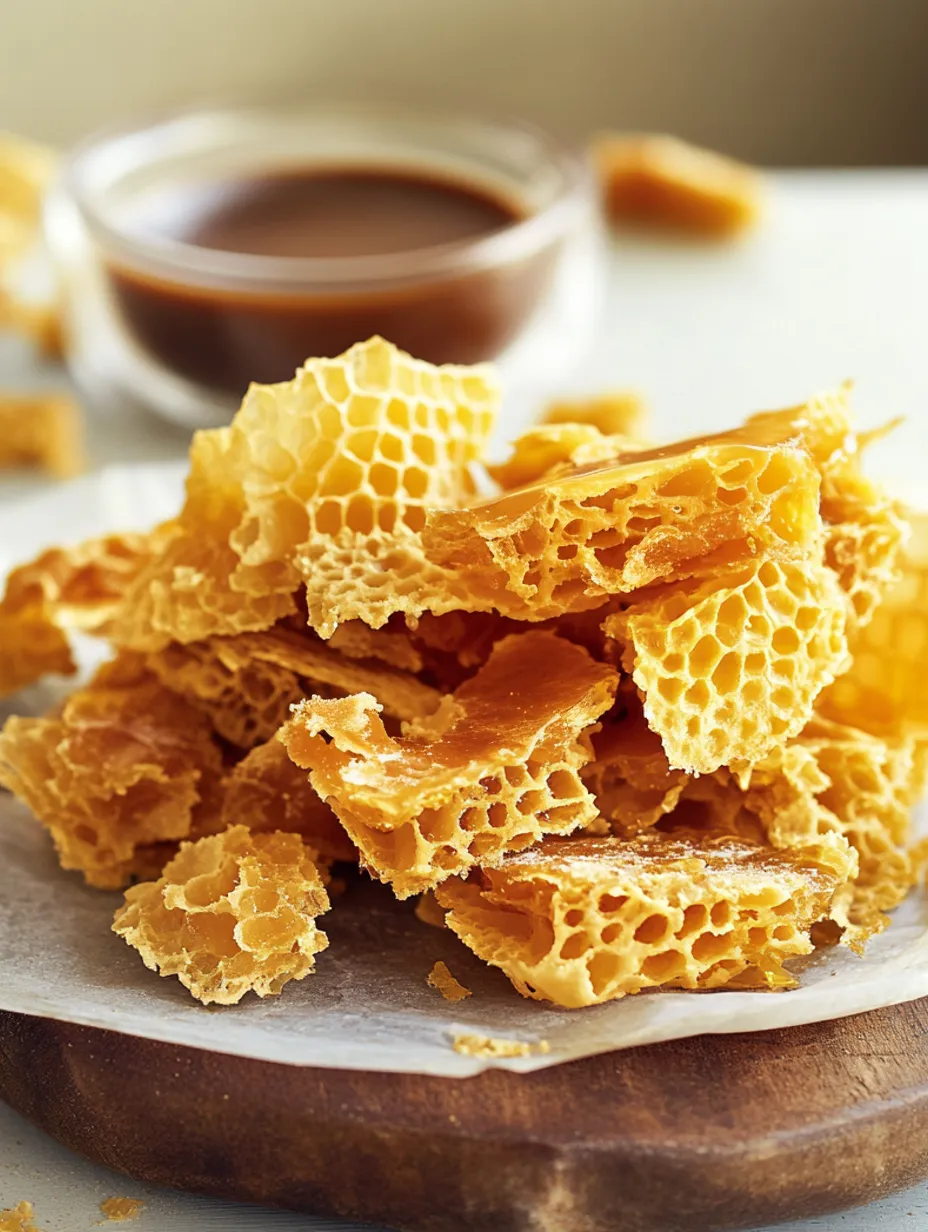
Bubble MagicAs soon as it hits the right temperature, take it off the heat and quickly mix in the baking soda, vanilla, and salt. This is the fun part! The mixture will suddenly puff up to maybe three times its size as tiny air pockets form all through it.
Moving To The PanPour the bubbly mixture into your waiting pan right away. Don't try to smooth it out or you'll squash all those nice bubbles. Just give the pan a gentle shake if you need to even things out a bit.
Waiting TimeLet it cool all the way at room temperature for about an hour. During this time the candy hardens and the bubbles stay put. Don't stick it in the fridge to speed things up because moisture can mess with the texture.
Breaking It UpWhen it's completely hard, use the paper edges to lift the honeycomb out. You can snap it into pieces with your hands or cut it with a sharp knife if you want neater shapes. Don't worry about some bits crumbling - that's just how honeycomb candy works.
The first time I tried making this, I picked a pot that was way too small. The whole thing bubbled over like a volcano experiment gone wrong! I had sticky amber goo all over my counter that hardened in seconds. Now I always grab my biggest pot and keep my potholders handy so I can quickly move it when needed.
Tasty Ways To Enjoy
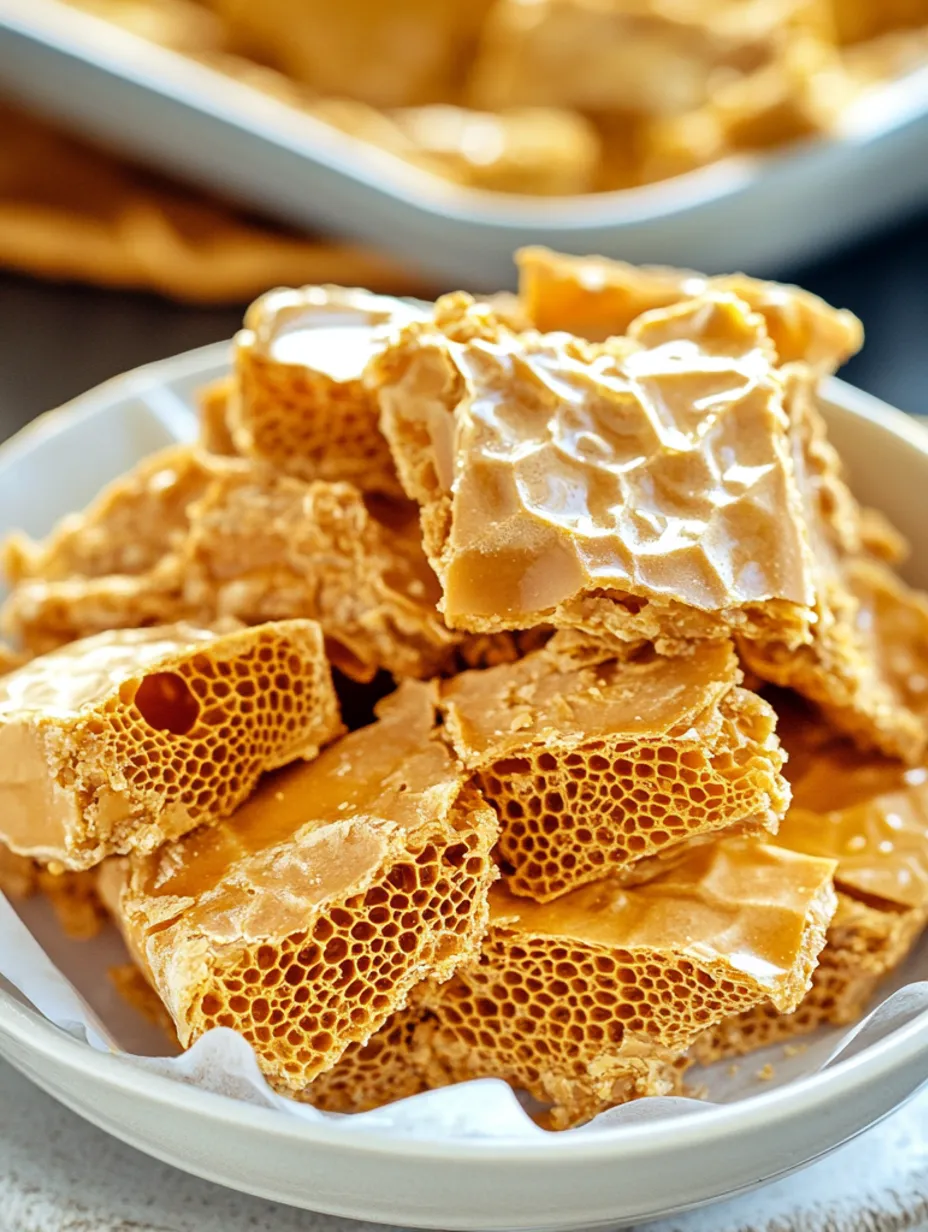
You can eat honeycomb by itself as a snack, or use it to jazz up other desserts. Broken pieces taste amazing on top of ice cream, adding both flavor and some crunch. Bigger chunks look fantastic as decorations on cakes and cupcakes - they'll make even store-bought desserts look fancy. For something extra special, dunk some pieces in melted chocolate and let them set for your own homemade candy bars.
Fun Flavor Twists
Want something different? Try adding a teaspoon of espresso powder with the vanilla for a coffee-flavored version. During the holidays, throw in some cinnamon or ginger for a seasonal touch. If you love chocolate, try coating cooled honeycomb with melted dark chocolate - the bitter chocolate works really well with the sweet candy.
Keeping It Fresh
Keep your honeycomb in a sealed container at room temperature with parchment paper between layers so the pieces don't stick together. Try to eat it within a week since it easily soaks up moisture from the air and can get sticky. Don't put it in the fridge or freezer because the dampness will ruin its crisp texture.
 Save
Save
Handy Expert Tips
- For easy cleanup, just soak sticky pots in warm water and the sugar will melt away
- Use a sharp knife with a bit of oil on it to cut your honeycomb without it sticking
- The driest days make the crispiest candy - save this project for low-humidity weather
I once took some homemade honeycomb to a family dinner and my great-aunt Dorothy, who never says anything nice about food, asked me which fancy store I bought the candy from. When I told her I made it myself, she didn't believe me until I showed her a video on my phone. Now whenever I visit, she always asks if I've brought any of that "honeybee candy" with me. Coming from her, that's basically the highest praise possible!
Recipe FAQs
- → Why doesn’t my honeycomb have bubbles?
- This happens if you stir too much after adding baking soda or press down when pouring into the pan. Be gentle because baking soda traps air, creating those bubbles.
- → Is there a substitute for corn syrup?
- Yes! You can swap it with an equal amount of golden syrup or use more honey. Corn syrup prevents crystallizing, but just watch the cooking process closely if you skip it.
- → Why does my honeycomb taste burnt?
- Overcooking is the culprit here. Use a reliable thermometer and pull it off the heat right when it hits 300°F to avoid burning.
- → How do I stop honeycomb from being sticky?
- Humidity is your enemy! Store it airtight with parchment between layers. Adding a silica gel packet or coating in chocolate also works as extra protection against moisture.
- → Can I mix in other flavors?
- Absolutely! Try orange, almond, or coffee extracts as substitutes for vanilla. Just add them along with baking soda after you’ve taken it off the heat.
- → Is this candy related to bee honeycomb?
- Not at all. The name comes from its resemblance to a honeycomb. Depending on where you are, people might call it sponge toffee, seafoam, or cinder toffee.